
Funky Pumpkin Decorating!
It’s that time of the year again – pumpkin decorating time! However, this year, why not put a spin on your traditional funky carving by putting the knife away and exploring the potential in paint?
Painting pumpkins not only looks great, but they also last longer and are a safe way for children or teens to complete their own Halloween design.
Step 1: Select your Pumpkin

Before heading to the store, take some time to think about your future pumpkin creation so that you can select the shape and size that best suits your design. Try to avoid any ridges or bumps (unless this is part of your décor), as they will be a bit more difficult to paint over. Instead, choose pumpkins that are smooth to the touch.
Step 2: Prepare the Surface

It’s time to clean your pumpkin. For this step, take out a small bucket, a little bit of dish soap, a sponge, and a small brush (to get into the crevices). Begin by removing all of the dirt from the surface so that the paint does not stick to the grit. Next, rinse the pumpkin well and allow it to dry.
Step 3: Choose your Base Colour

The pumpkin has become your new canvas, which means you don’t have to stick to orange. In fact, you can quickly transform the colour of your pumpkin with a little bit of spray paint. The benefit of using spray paint is that it will stand up to the rain, sleet, and even snow, while completely covering the original colour of your pumpkin.
If spraying outdoors, make sure to choose a sunny day to allow the paint to dry. For best results, apply at least two applications.
Step 4: Choose your Pumpkin Style
Social media is jam-packed with examples of incredible pumpkin transformations. The beauty of this fall trend is that anything goes, so choose the style that best suits your personality and fall décor.
Here are just a few of our favourites:
A Touch of Class
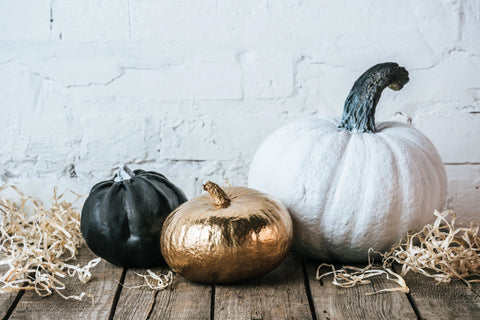
It may seem strange to describe a pumpkin design as something elegant; however, a few simple techniques will transform that pumpkin into a beautiful showpiece.
- This design begins with a can of spray paint. Choose from classic white, metallics or iridescent paint to add a bit of glamour to your outdoor décor.
- This pumpkin can either be left as is, grouped with a few other pumpkins, or elevated with the addition of a bit of décor.
- Ramp it up a notch, by adhering small gems in a paisley or swirl pattern to add sparkle or pull out the mod podge and decoupage your pumpkin with your favourite wallpaper or scrapbook designs.
Sensational Stencils

Stencils are a quick and easy way to create a unique design on your favourite squash. From monogrammed pumpkins to unique patterns, stencils are a simple way to create a stunning centre piece.
- Paint the foundation: white and pastels provide the perfect base for a design to pop.
- Securely attach the stencil.
- Use a sponge brush and cover the stenciled area with acrylic paint.
- Allow to dry.
- Gently peel off the stencil and show off your finished product.
Express your Inner Picasso

Who says splatter paint needs to be confined to a canvas? This year, why not take your creativity to an entirely new level with a splash of paint.
Warning: this craft activity can become a little messy
- For best results choose between three to five colours of paint then prepare your splatter paint by mixing standard acrylic paint with a few drops of water.
- Dip a standard paintbrush into the paint.
- Flick the paint onto the pumpkin.
- Repeat until you achieve your desired effect.
Absolutely Marbleous: The Art of Paint Pouring

Have you fallen in love with the marbled look? Then it’s time to try out Pumpkin Paint Pouring. This beautiful effect can be done with only a few simple tools, including acrylic paint, Liquitex Pouring Medium, and a bit of patience.
- Mix two to three colours of acrylic paint with Liquitex Pouring Medium. Metallic and iridescent paint are beautiful options to showcase this effect.
- Slowly blend the colours into a cup. This will provide you with a sneak peek of the marbled effect that will be displayed on your pumpkin.
- Patiently pour the paint on top of the pumpkin. The slower, the better, as this will allow you to control where the paint will fall onto the pumpkin.
- Continue the process until the pumpkin is fully covered.
- Finish your design with a spray of acrylic paint sealer.
Go Vinyl

Calling all Cricut lovers: it’s time to place your favourite design on your pumpkin. Using outdoor vinyl is a great way to transform your pumpkin into a picture-perfect design. This technique can be used in a variety of ways including, showcasing your favourite phrase, a unique pattern, a Jack-o’-lantern face or a spooky image.
- Use a stencil or Cricut to trace and cut your desired shape.
- Peel and stick onto the surface.
- Continue until your design is complete.
This fall, discover your inner pumpkin artist and create a unique design with the power of paint. From refined designs with stencils to abstract showpieces – the only rule with creating these funky pumpkin masterpieces is to have fun!